Monday, 11 March 2019

One-Pass Brioche

Now with Videos!

Seems I'm making videos, I'll start at the beginning. I still haven't found a good video for my favourite cast on, so here's the Chinese Waitress Cast On, Left Handed.
I use this for everything, including brioche, I just start working with the contrast yarn then tie and weave it in later.


And here is the One-Pass Brioche. It gets such a nice swinging zen to it. While this is based on the Sockmtician's One-Pass Brioche method, I found that holding the purl yarn at the front consistently simplifies things significantly.


It's my absolute favourite thing at the moment. And it will just keep getting better... watch this space...

Friday, 1 March 2019

Back to Brioche

Yes, it turns out I do get distracted easily. Pretty colours, luscious textures, challenging new techniques and gorgeous patterns just keep popping up everywhere and taking me off on tangents.
This time it’s a combination of all of these that have me obsessed.

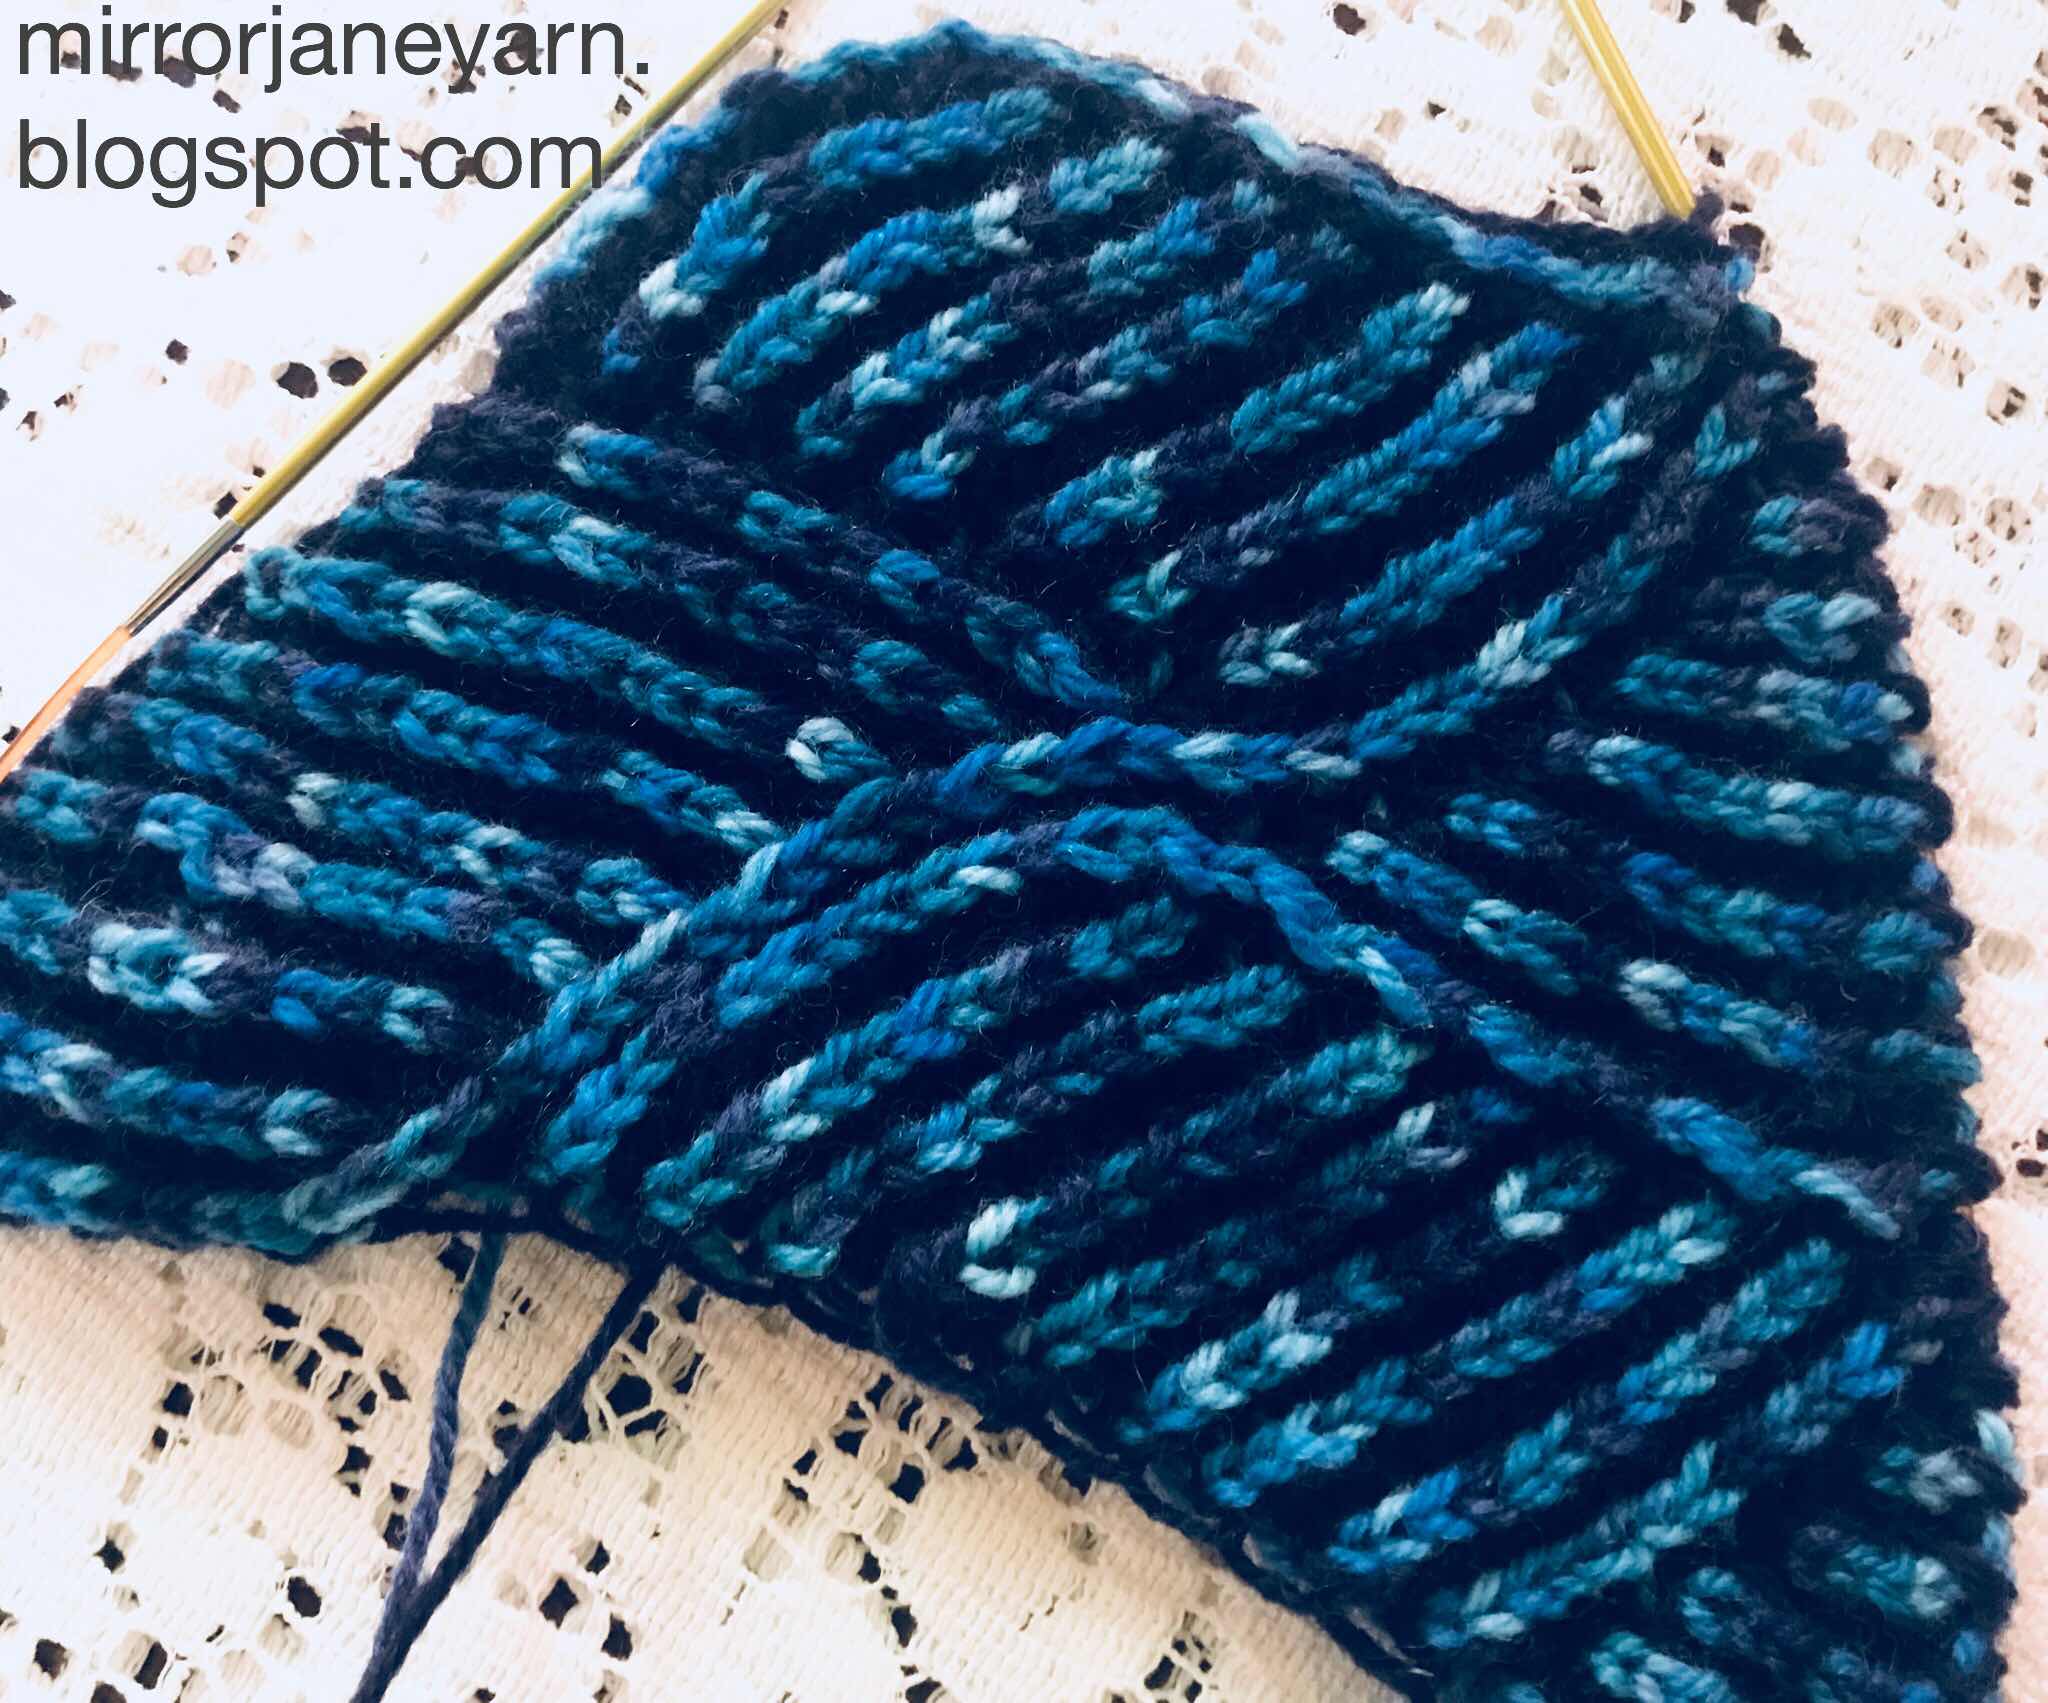
Interweave hat in teeny sock yarn
We have the beautiful Misti Alpaca Hand Paint Sock that my husband only wanted ankle length socks out of. I’m not one to argue when it leaves me half the skein to play with! I did love making them and he does love to wear them, so it’s certainly up there on my list of successful projects. This yarn is just gorgeous knit up normally, I was stupidly excited by the idea of trying it in brioche. It's just the most amazing combination of colour and texture.
I picked this one up on a weekend trip to Launceston, a lovely yarn store called Knits Needles and Wool.

Misti Alpaca Hand Paint Sock
On my next adventure, I picked up the contrast, also Misti Alpaca Sock in a gradient dye at the Woolshed in Canberra. It’s now my mission to visit these little shops everywhere I go, they are all so wonderful!

I’ve had the Interweave Hat in my Ravelry queue since my last affair with brioche early last year. I think there are another two or three pairs of yarn in my stash that are also slated for making this hat. It's so pretty and a very sensible pattern, once you get the hang of it. Of course sock yarn was probably not the ideal thing to try it out for the first time but I’m a deep end kinda girl. Same goes for my first attempt at one-pass brioche.

I found the Sockmatician’s One-Pass Brioche technique as I was learning early last year and immediately put in the Too Hard basket. As it turns out, it’s not much more complicated than regular brioche knitting per stitch, keeps things simpler with all the yarn at the same spot in the project, and really does get a beautiful rhythm to it.

It also turns out that the increase and decrease instructions I left for myself on my intro brioche post were terrifying, so I'll work on putting something much better together.

For now I keep my fingers crossed that I will have enough variegated yarn to get through this quite ambitious project, and in the meantime just really, really enjoy myself!

Monday, 31 December 2018

Making Socks Easy

I decided I was going to try making socks. Tried a couple of worsted weight, simple short row heels. Pictures of the atrocities are featured elsewhere. But I figured it could get better, but want to try some nice sock yarn. Enter my Mum at birthday time in a yarn store. She's dangerous because she is also a textile hoarder and just loves to say: "Yes, and why not get it in blue, as well?". Now all hell has broken loose. My husband has been dragged to yarn stores to pick skeins. It's bad.
So here is everything I'm loving about socks.


Yarn


  • Bis-Sock by Biscotte Yarns: 85% Merino, 15% Nylon - feels like warm satin clouds spun into yarn. Also self-striping in insanely pretty colourways. This is Arielle.
  • Malabrigo Sock: These guys have the most striking colours. They make me just want to pick them up and gaze while I pat them for hours.
  • Misti Alpaca Hand Paint Sock: I could not put this skein down once I picked it up in store. So soft, so pretty. Alpaca/merino/silk/nylon, I cannot believe these are destined for my husbands feet. He had better appreciate them, though I am definitely going to enjoy the crap out of knitting them.

Needles


  • HiyaHiya interchangeable sock set: So tiny, so sharp! The cables are super soft and flexible and swivel so they don’t get twisty or undo the needles. A set of 5 sizes from 2-3mm with 4 circ cables. 

Patterns


  • Eddie's Super Sock Calculator: This was the first pattern I tried with my worsted weight socks, and everything that was wrong with those socks was all down to my terrible knitting. It's the simplest, most perfect thing ever, and taught me how to short row.
  • Zhenya's MUMTU socks: my first attempt with sock yarn and heel flaps, and the basis for my super happy simple pattern.

Skills


  • Judy's Magic Cast On: The best things my socks have going for me, even exclaimed over by a lovely stranger in a yarn shop. The super best thing is Ann's beautiful Left-Handed video.
  • Two at a time on Magic Loop: The concept that made sock knitting a possibility for me. I'm terrible at finishing projects and assume that if I tried to knit one sock at a time I would have an infinite collection of single socks. I would probably be a good patron for the local amputee association. So the idea of knitting both at once, and that they would then turn out exactly the same, was a revelation. And that I could then package them up neatly and take them anywhere was the icing on the cake. I cannot, for the life of me, remember where this amazing idea came from, however. Probably a half-asleep scrolling Pinterest lullaby that got processed and mushed up overnight. I'll get back to you.
  • Yarn Over Increases: Both the toes and the gussets are increased on alternate rounds. This makes the yarn-over increase the perfect way to remember where you're at. Yarn over on round one, knit the yarn-overs through the back loop on round two. When (not if) you get lost, look for the yarn overs. If they're there, knit 'em tbl, if they're not, chuck 'em in! Easy! Just make sure you do knit through the back of the stitch when you come back around, otherwise there will be holes. 
  • Shadow Stitch Short-rows: makes picking up the stitches for the heel flap almost too easy. Like, 'I'm obviously doing this wrong and it's not going to work' easy. But it works perfectly. I'll get back to you with a left-handed version of this one, as I said, I learnt from Eddie's Super Sock Calculator.
  • Purling Backwards: The ultimate in smooth, zen heel knitting. By purling the short rows and heel flap backwards, you eliminate the stop-start arrhythmia of turning the work, and make the shadow stitches much simpler on the purl row.

The Super Happy Simple Pattern


  1. Dump all of the numbers into the MUMTU pattern; pick your primary stitch count and put the right numbers in instead of letters from the chart.
  2. Cast on about two-thirds of your total stitches (E) using Judy's Magic Cast On and knit a round.
  3. Increase until you have E stitches. Round 1 (each needle): K1, YO, knit till 1 left, YO, K1. Round 2: knit, knitting yarn overs through the back loop. 
  4. Enjoy knitting blithely until your sock is 8.25cm shorter than you'd like it to turn out.
  5. Start increasing on one needle using the alternating yarn over rows from the toes. This is the gusset and will be the sole side. Keep going until you have D stitches.
    Up to now, it's basically just the MUMTU pattern. We'll stop working in the round and turn each heel separately. This is where the magic happens, it's when things get really lazy, and we're going to totally mess up the heel extension section. The G and J stitches are still going to hang off either sides, but in-between will just be worked in Shadow Stitch Short Rows. Don't worry about all that other jazz. 
  6. Knit until there are J+1 stitches remaining, make a shadow stitch so J stitches are left hanging. 
  7. Purl backwards until there are G+1 stitches remaining, make a shadow stitch so there are G stitches left hanging.
  8. Now the short row section is pretty obvious, keep making short rows until there are K stitches left as singles. End heel extension; begin revelation.
  9. Now we need to pick up L stitches on each side of the short rows. If it's an odd number, knit the first two shadow stitches together. Otherwise, knit through and treat every shadow stitch as an individual stitch, the purl back the same way so you have E-2 (or M) stitches, plus the G and J stitches on the side.
    Now we can get back to the ordinary, lovely heel flap.
  10. Sl1, K1 and repeat till the end, SSK the last heel flap stitch and the first hanging J stitch together.
  11. Sl1, purl back, P2tog the last heel flap stitch and the first hanging G stitch.
  12. Repeat 10 and 11 until there aren't any hanging stitches left. If you like, bung in an extra Sl1 at the start of every second knit row for fancy Eye of Partridge stitch.
  13. One the heel flap is done, you've got two less stitches on the heel needle than the instep, so make an extra one to the right of the flap, using a lifted increase. It will help close the little gap. Then do the whole heel thing from 6 to the second sock.
  14. Once the second sock has a heel and an extra little stitch, get on back to the magic loop thing and knit across both insteps.
  15. Add that lifted increase to the left side of the heel flaps, so you're back to your original stitch count (E).
  16. And thats it for the tricky-fun part of socks. Go ahead and knit till you run out of yarn, rip back an inch or two and re-work that last bit in rib. You can probably find a better solution to the top of a sock than that, like measuring and weighing or using an actual pattern or some such.
  17. Bind off with something super stretchy. The interlock stitch bind off is brilliant, but again, only a right-handed resource. I have a list and some really terrible videos coming your way.

Enjoy!

Saturday, 24 November 2018

Ankhar Earrings


These earrings are based on Karen Cabrera’s
basic ankhar tutorial #105. Karen’s videos are brilliantly made, even though they’re backwards. 

This is an elegantly simple design, made just with rings on a single shuttle. An 8mm bead is fixed to each earring as part of the finishing loop. 

Use the Larks Head join to keep everything smooth. Again Karen Cabrera is my go-to for this technique, I use the original #85. 

Use small, decorative sized picots. There needs to be enough room to allow two joins, but still keep everything in tight. 

Don’t tat in the end at the beginning, use it to secure the bead and tension at the end. 

R1: 16-8
R2: 10+10
R3: 8+8-8
Repeat R2 and R3 until there’s 5 of each
R11: 8+16

Cut the end long. Thread behind each front ring and through R1 to the back to cinch the curve down. Thread the bead on, loop over R11 and back through the bead. Tie to first thread and stitch in ends. The ends can also be threaded back through between the rings to give a little extra tension and height, and tied around the base of R11 then just snip off closely. Fix an earring hook around the final ring.

Make the second earring the same way. When finishing, make sure the rings overlap the other way around, and fix the earring hook to the other end.

Last year, I was attaching findings to picots. Unfortunately, the hooks I use seem to have too big of a gap to be securely attached to a mere picot and couple of my gifts wandered off by themselves. I've now taken to fixing the hooks around an entire ring, so there's no chance of them going anywhere and I don't have to worry about adding random picots.

The ankhar earrings pictured are made with #20 Milford Mercer in Black and 8mm glass beads. 

Tuesday, 1 May 2018

Distracted by String


I’ve been very lax in posting as I’ve been obsessively busy making things. I thought I had calmed down enough to spend a bit of arts and crafts time writing about arts and crafts but aparently not. So here’s what I’ve been making!


A hideous pair of socks!
Mister has one foot slightly larger than the other from an old injury so I thought it would be nice to make him a pair of socks that fit both feet. Maybe with a couple more tries they could be wearable. 


A brioche scarf!
A gift for my father who will probably think it’s too shapey but, hopefully, will enjoy the squishyness. 


A slightly less hideous pair of socks!
More practise still required. And a new bind off. 


A lace cowl!
Turns out I can’t work a lace piece and a brioche piece at the same time, my fingers get confused as to what they’re supposed to be doing with yarn-overs. My own fault, I suppose, for trying to do everything at once!


A necklace!
The piece-de-resistance and four weeks solid effort. Some happy tatting, but a lot of un-tatting and frustration. Many times did I happily finish a section, put it on and be horribly disappointed with the way it puckered, gaped or cupped. Even after three attempts at trial runs.
All positive credit to Marilee Rockley, whose beautiful work hand-dyeing thread inspired me to attempt it myself and acutually get the colours I needed, and for her beautiful Beguile design on which this piece is based. It is only my inexpert additions and fuddling about that caused my issues. 
I take my hat off to all of the designers out there, your efforts are amazing and it will be a long time before I attempt any such thing again!

This piece was made with Lizbeth 10  thread in what was originally Bright Dark Turquoise #663 and Turquiose Twist #142. However, I dyed over it with some half-strength Dylon Tropical Green to make a more greeny shade of teal to suit my Nan, to whom I gave it as a birthday gift. 

Wednesday, 14 February 2018

More TIAS

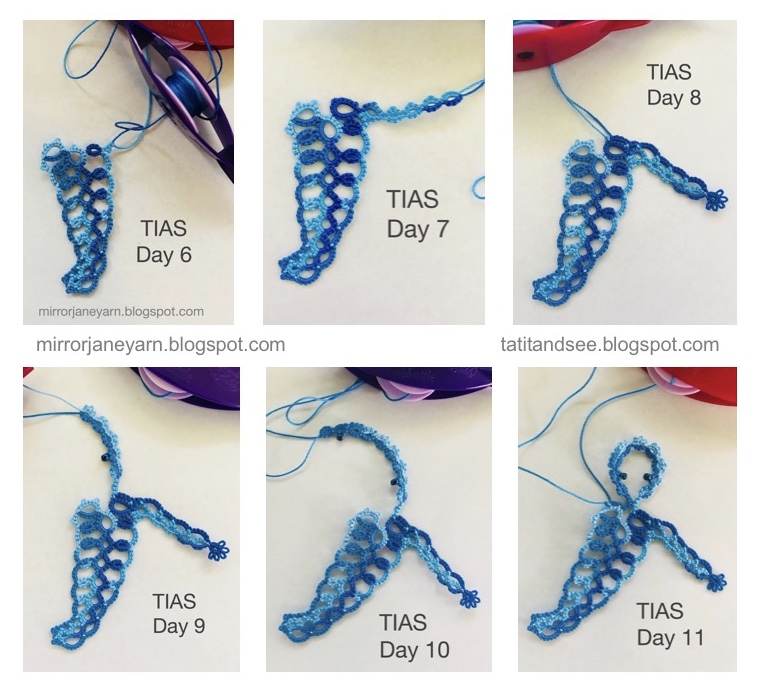
It's coming together! Check out the game at Tat It and See.

As always, I'm enjoying working Jane's pattern. They are so well written and worked, I love how she presents backside elements.

The split rings have been so tiny and I had a couple of moments getting my head around some of the direction changes with the chains, but careful reading and following the thread has got me thus far without any dramas.


Saturday, 10 February 2018

Cool snap for cosy yarns

We had a lovely cool snap last week that inspired me to pull out some of my cosy yarns and try some new things I’ve had on my list for a while. Enter two-colour brioche knitting.

Hideously ugly but so much fun!

This grabbed me the first time I saw it. Gorgeous patterns in vertical stripes of fluffy, squishy fabric. I’ve had so much fun with the colours even though I am absolutely terrible at it! I couldn’t find a left-handed video for this, but I did find a good few left-handed knitting basics: CyberSeams Left-Handed Basics Playlist. Hopefully I will get good enough as it cools down to make a video as well as something other than horrific swatches.

Here's my list of brioche basics:
yoS1: Always slip purlwise with yarn in front - gives the magic yo and leaves yarn A at the front of the row
Basically, stitch shawled stitches, slip single stitches
   brK - Brioche knit: knit the stitch with opposite colour shawl as one stitch
   brP - Brioche purl: purl the stitch with the opposite colour shawl as one stitch
As the pattern comes it its easy to tell which is which, but concentrate for the first few rows

Increase - brK-yo-brK brioche knit the same stitch twice, but put a yarn over in the middle. Like K1fb, but knit both through the front to avoid odd colour crossover. Pbk: Purl through the back of the yo to avoid lacy hole, if its a problem.
Decrease Right: brS1-K2tog-psso: slip shawled stitch knitwise, knit shawled and single stitch together, psso
Decrease Left : brS1-K1-psso-psbk-psno-psbk: slip shawled stitch knitwise, knit single stitch, psso, pass stitch back to right needle purlwise, pass next shawled stitch over, pass stitch back to left needle purlwise.
Really keep track of exactly where your yarn over is. If it gets dropped or otherwise messed around, the odd yarn crossovers happen and you often can't tell until it comes out in pattern. 
Swatch Pattern - What I was trying to do with the yellow (yarn A) and purple (yarn B) number.
Setup
Cast on 17st w/ chinese waitress in yarn B
0b: *K1 yoS1* … K1 (repeat sections in *asterisks* as many times as needed before the last stitch or as many times as noted)
Start w yarn A - these rows 1 and 2 are the basic brioche rib

1a: S1 *brK yoS1* … S1 slide back to start of needle to purl yarn B
1b: P1 *yoS1 brP* … yoS1 P1 reverse work
2a: S1 *brP yoS1* … S1 slide back to start of needle to knit yarn B
2b: K1 *yoS1 brK* … yoS1 K1 reverse

From here, all of the interesting things happen on the knit side of yarn A (odd # a), only one inc or dec per set, trying to keep it simple. Just keep track of where you’re at.

3a: S1 brK yoS1 brKf-yo-brKb yoS1 *brK yoS1* … S1 slide (inc at col 2)
3b: P1 yoS1 brP yoS1 Pbk1 yoS1 *brP yoS1* … P1 rev
4a: S1 *brP yoS1* … S1 slide
4b: K1 *yoS1 brK* … yoS1 K1 rev
5a: S1 *brK yoS1*x4 brS1-K1-psso-psbk-psno-psbk *yoS1 brK*… S1 slide (dec left at col 4-5)
5b: P1 yoS1 *brP yoS1* … P1 rev
6a: S1 *brP yoS1* … S1 slide
6b: K1 *yoS1 brK* … yoS1 K1 rev
7a: S1 *brK yoS1*x6 brKf-yo-brKb yoS1 brK yoS1 S1 slide (inc at col 7)
7b: P1 *yoS1 brP*x6 yoS1 Pbk1 yoS1 brP yoS1 P1 rev
8a: S1 *brP yoS1* … S1 slide
8b: K1 *yoS1 brK* … yoS1 K1 rev

9a: S1 *brK yoS1*x4 brS1-K2tog-psso *yoS1 brK*… S1 slide (dec right at col 4-5)
9b: P1 yoS1 *brP yoS1* … P1 rev
10a: S1 *brP yoS1* … S1 slide
10b: K1 *yoS1 brK* … yoS1 K1 rev

Repeat rows 3-10, finish with set 1-2

To bind off, complete 1 row in pattern with yarn B, but without the yo  (so K1 *brK P1* … K1) then bind off loosely in pattern.
These are a couple of the brioche videos I've been working from, unfortunately they are right-handed, sorry!
    Explanation and basics with Knitting Expat
    Basics, Increases, Decreases with Sosu

Even though everything looks terrible now, I'm definitely going to stick with it. It's fun to work, feels so lovely and fluffy and squishy, and I can see so much potential for designs and colour combinations for winter pieces. In the meantime, it's warmed back up, so it's probably going back in the box for a while.