With her amazing design and tech skills, Robin has put together her diagram left-handed for us.

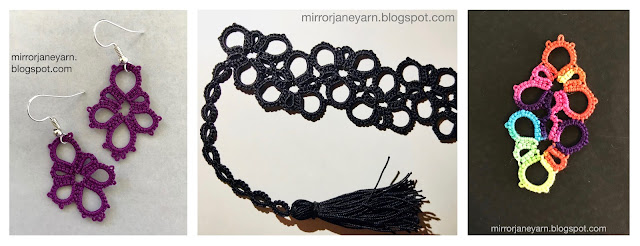
This is a two shuttle pattern, with the red worked with shuttle 1 and blue with shuttle 2. Once you’ve got the hang of the first few triangles, you can make so many things with this pattern. You just need to think about where the split ring will go. Robin includes on her blog the braid shown here, then, expanding from there, a bookmark, mat and hexagonal doily. I've used just the original braid as a bookmark and made a couple of pairs of earrings as well as a serviceable but particularly unspectacular coaster - learning is fun!
Tricky parts for these are the split ring, upside down larks head joins and second shuttle split ring joins. I haven't found a method for the last that I'm super happy with, yet. Be sure to sure to mark the shuttles if you have a matching pair, it gets confusing really quick! Great practice for working two shuttles, split rings and getting the right tension when starting new rings in clusters.
I did complicate this for myself with my preference for frontside/backside and larks head joins, so if you're not so fussy it's a much simpler pattern.
The pieces shown are worked in Milford Mercer 20, Indigo and Black, and Lizbeth 20 #184 Rainbow Splash.
Thanks Robin!

No comments:
Post a Comment